Summary
In this blog series, we dive deep into the peering coordinator workflow and show how the right tools can help you be successful in your role. In part 1, we discuss the economics of connectivity.
- Part 1: Economics: How to understand the cost of your connectivity
- Part 2: Performance: How to understand the services used by your customers
- Part 3 - Analyze: How to improve your CDN and peering connectivity
- Part 4 - Select: How to find the right transit provider
The peering coordinator’s toolbox is a blog series where we’ll dive deep into the peering coordinator workflow and show how the right tools can help you be successful in your role.
A peering coordinator is the person responsible for the way an IP network connects to the rest of the internet. “Peering” is the term used for interconnections between two IP networks where the two networks provide access to each other’s networks and customers but do not allow traffic to transit to the rest of the internet.
This series will walk you through each step of the flow, from getting the full overview of your interconnection-related cost, to learning how to determine which networks you need to seek peering with, to understanding which transit provider will best suit your needs. The series will give readers insight into why the internet is the network of networks.
Part 1 - Economics
How to understand the cost of your connectivity
One of the basic elements of a successful peering strategy is to understand internet connectivity costs. Comparing your transit price with the cost of a port to an internet exchange (IX) will not give an adequate picture since a number of other factors need to be taken into account.
Cost elements
The most straightforward elements of your interconnection costs are:
- Traffic costs, which often are divided into a fixed part (the commit) and a variable part (the burst), the latter of which is determined by the volume that exceeds the commit. (It’s also common to not have a commit.)
- Port fee
- Cross-connect recurring fee
- Membership fee in the case of an IX port
- Transport costs if you are connecting using metro fiber or waves
All of the costs above are easy to collect on a monthly basis. For the traffic cost, you will need to collect the traffic data from your network. The most common method of charging traffic volume is to charge per Mbps of the 95th percentile of the highest direction. This way you are not paying for short bursts of traffic, and the provider is getting paid for the network they need to secure to carry your traffic. The charging method will be part of your contract, and the mix of fixed and variable costs will depend on your traffic profile and your negotiation skills.
Other costs associated with a transit, peering or IX connection are the housing costs for the point of presence (PoP) where the port is terminated, the hardware costs and, in some cases, the backbone costs to connect the PoP to the rest of your network. To estimate these, you need to understand how your planning and finance colleagues model the network cost. You also need to understand how to convert the CAPEX, i.e., the one-time costs when you buy the hardware, into OPEX, which are recurring costs that you can use to calculate a monthly cost for your interconnections.
When you buy hardware for the network, the value is entered into the books as an asset, but this asset will immediately start to lose value. The rate of depreciation for hardware is typically three to five years.
Say you pay $10,000 for a line card. Your finance team assumes it will be worth $500 when it is fully depreciated after three years. The monthly depreciation rate can then be calculated like this:
($10,000 - $500) / 36 = $264
The planning team can give you the fraction of the monthly depreciation rate that an interface on a router should be assigned. Use this number as an input to calculate the total cost of the connection.
If your network is very uniform and your interconnection choices do not make much of a difference to your hardware spend, you can make the necessary comparisons without adding the hardware and transport costs to the connections in the tool.
Creating an overview
Once you have determined which cost to track for each connection, we recommend using the Kentik Connectivity Cost workflow to register and track your total interconnection cost.
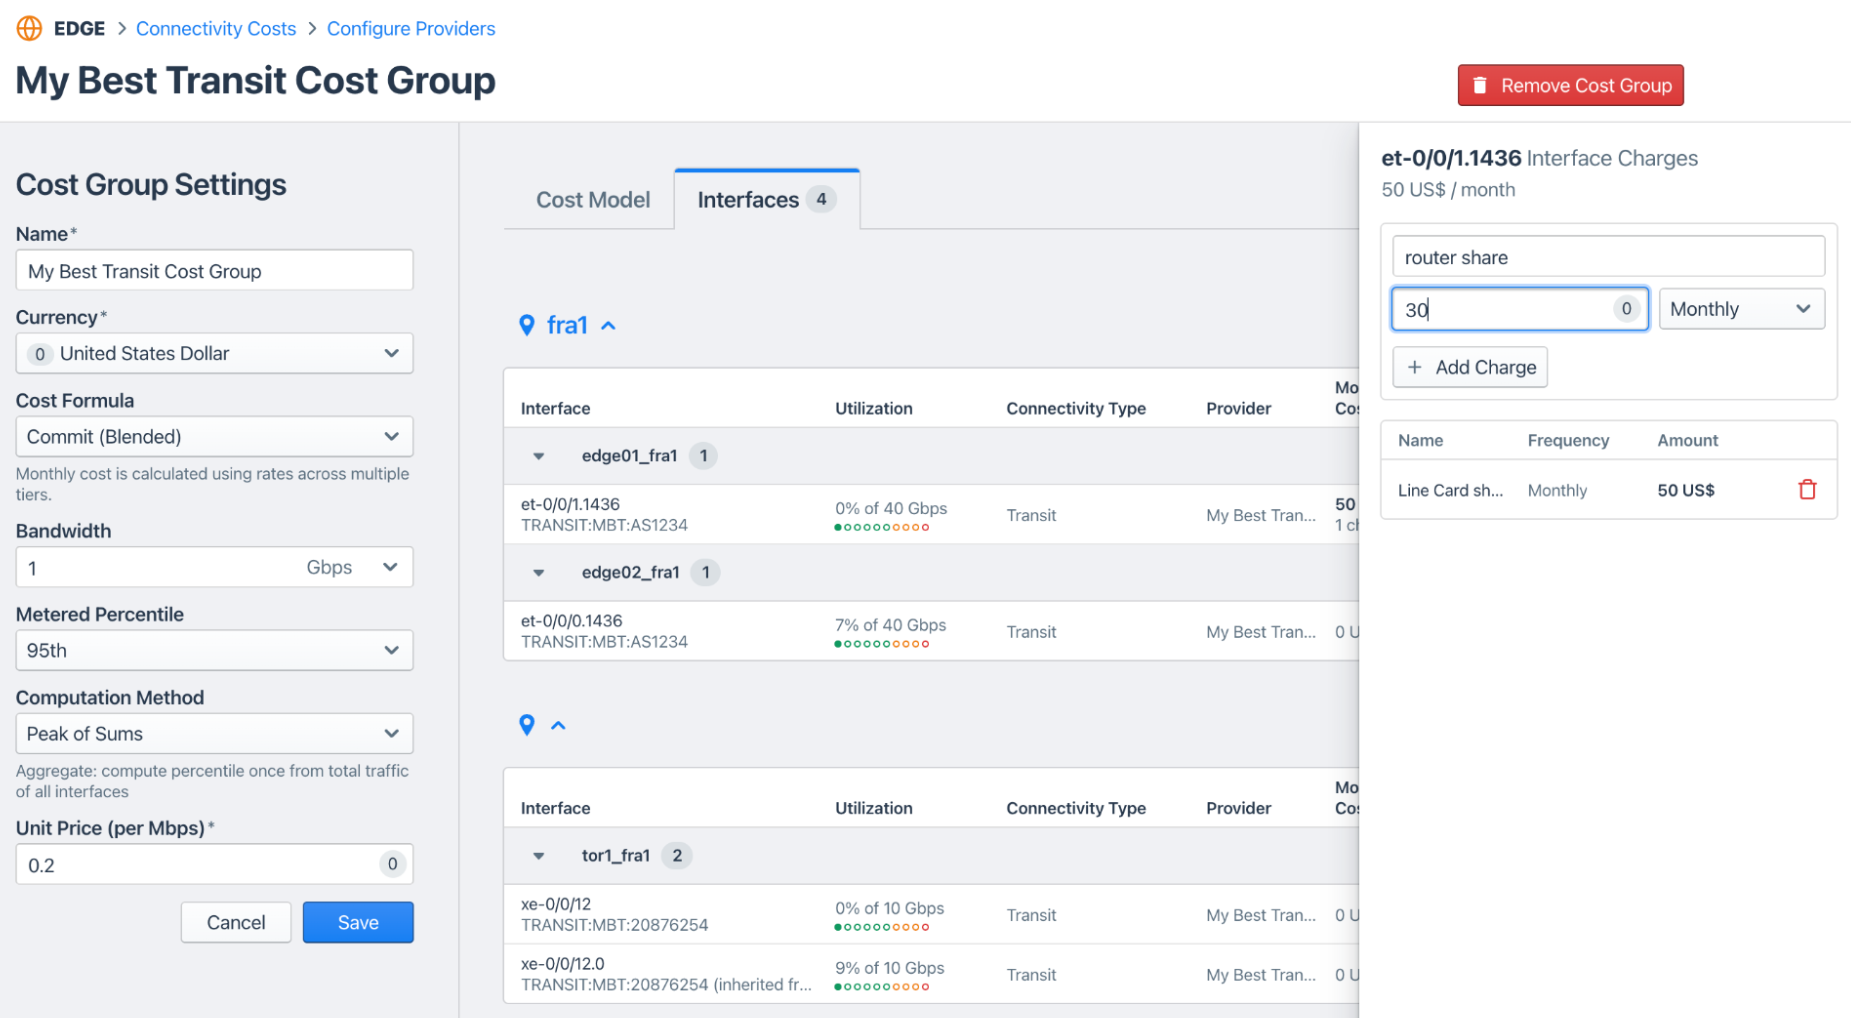
In the example below, we have a monthly cost of $50 for the share of the line card, and $30 for the share of the router that can be assigned to the interfaces we use for “my best transit” interfaces.
| My best transit | Monthly cost | Kentik cost element |
|---|---|---|
| CAPEX | ||
| Share of line card per interface | $50 | Interface cost |
| Share of router per interface | $30 | Interface cost |
| OPEX | ||
| Commit 1G $/Mbps | $0.20 | Cost group commit |
| 1G < burst < 5G $/Mbps | $0.15 | Cost group Tier 1 |
| 5G < burst $/Mbps | $0.10 | Cost group Tier 2 |
| Cross-connect | $100 | Interface cost |
| Share of housing | $5 | Interface cost |
The Kentik Connectivity Cost workflow begins by suggesting the potential providers based on your interface classifications. GTT is already configured in the tool as one of your providers. “My best transit” was suggested based on four interfaces in two different PoPs.
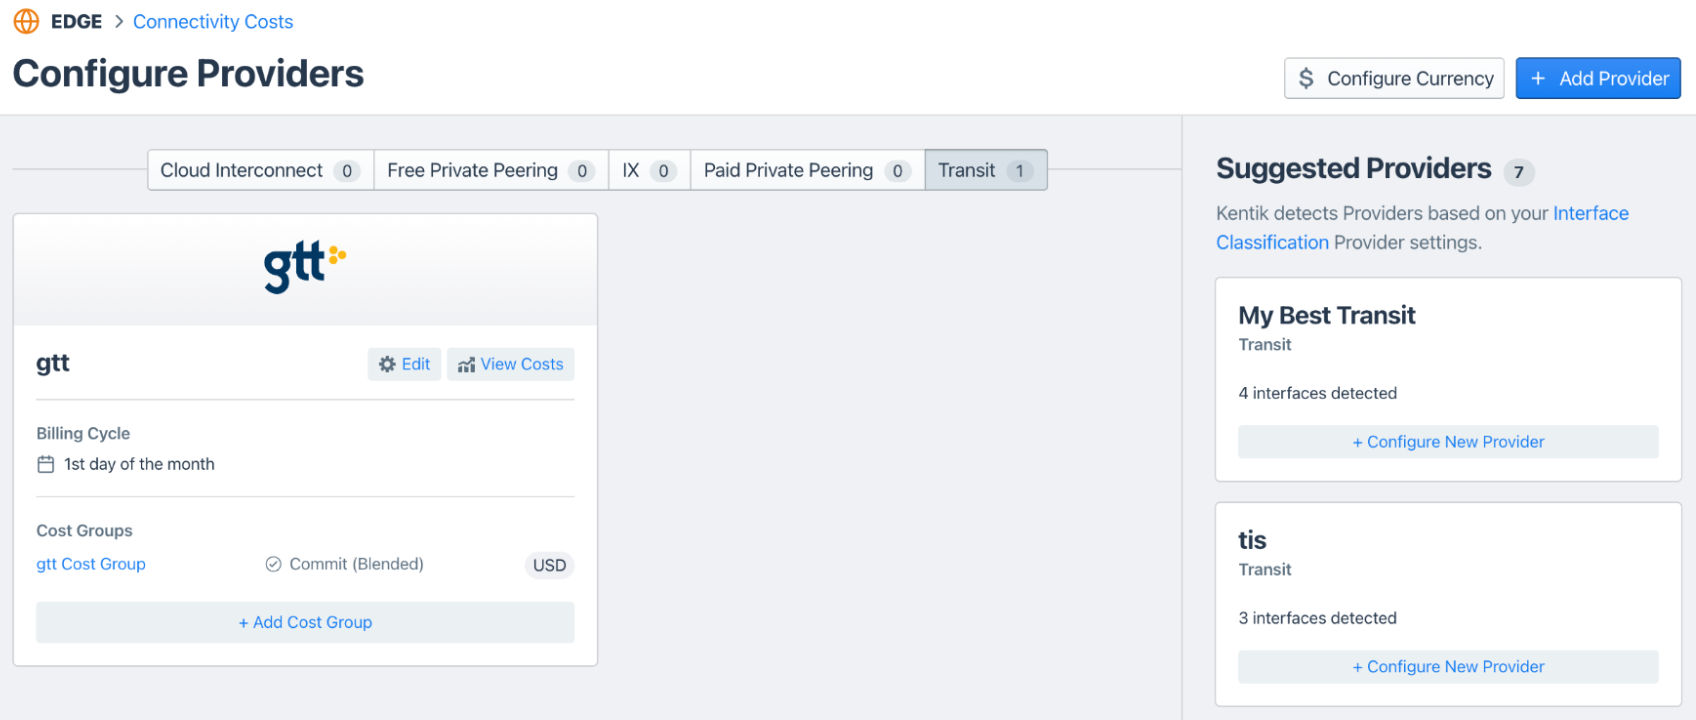

The next step is to add the contract details, edit the auto-generated details and empty the cost group.

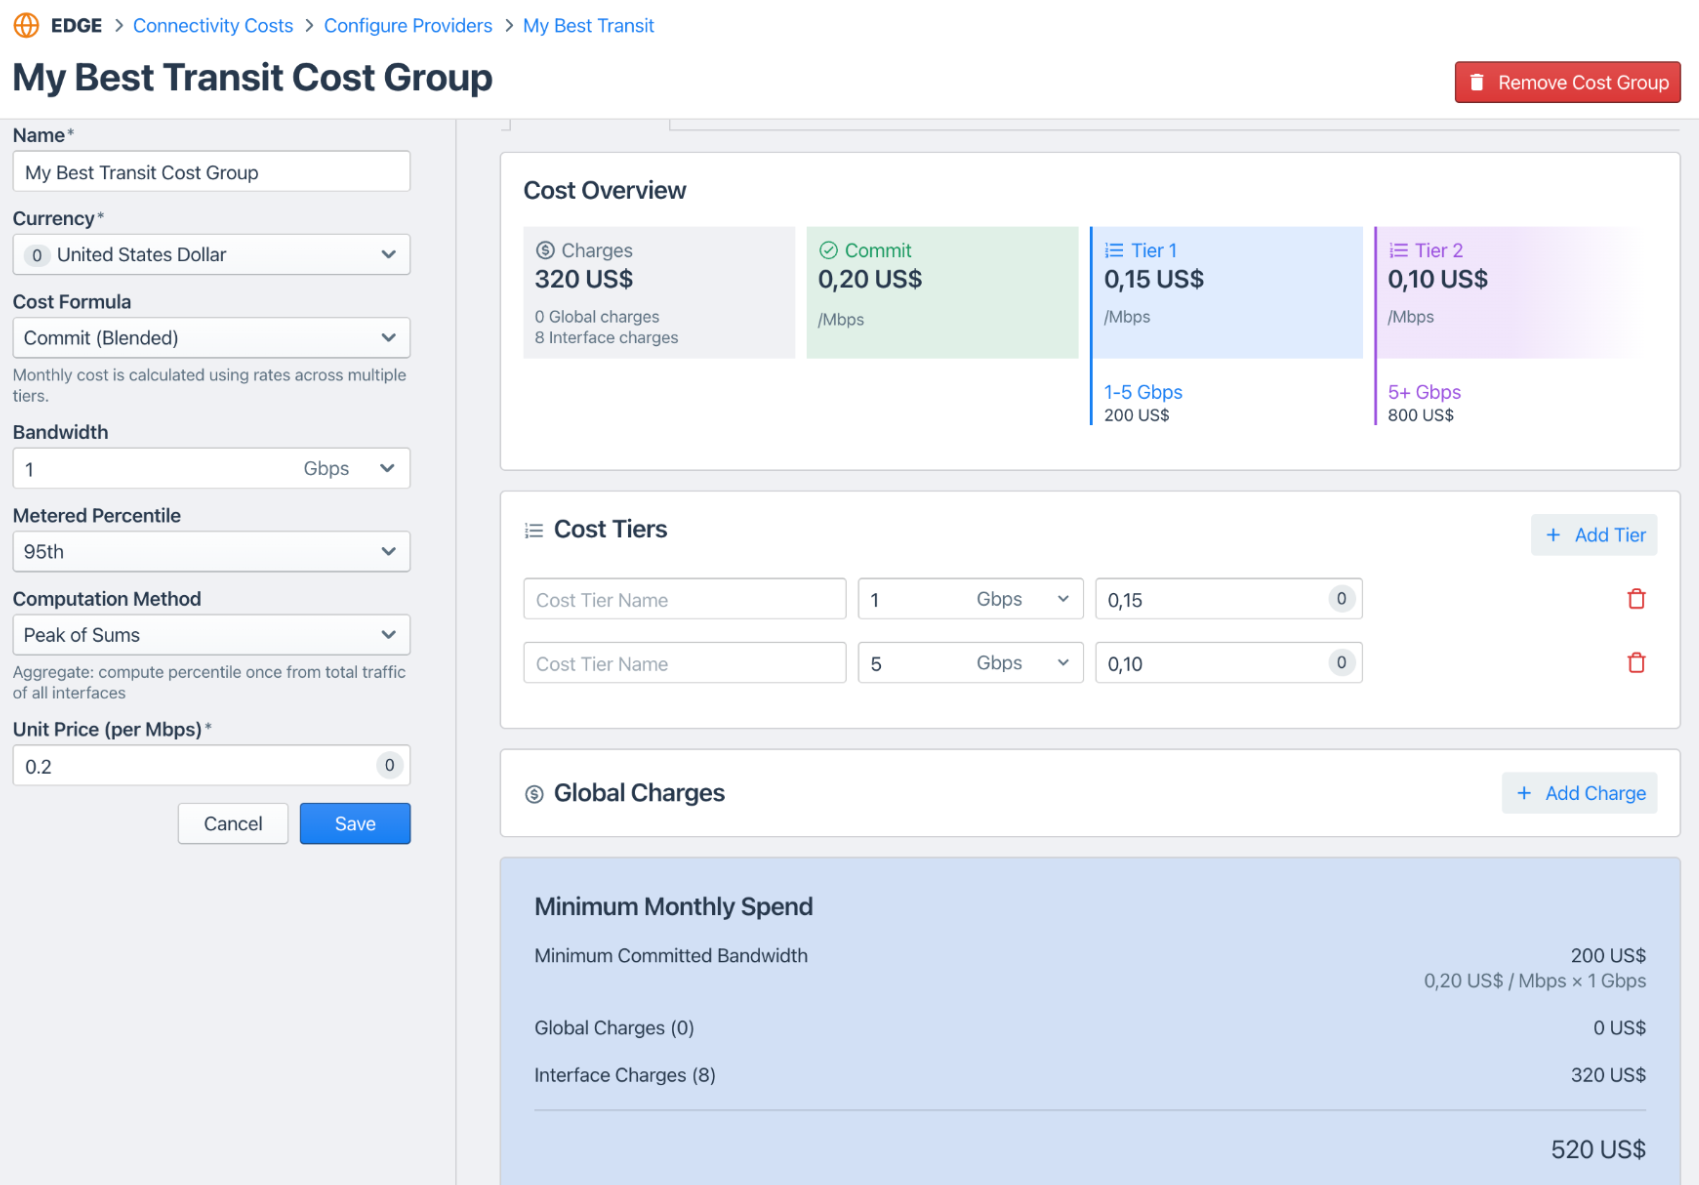
The cost group is where we add the details we’ve gathered in the cost overview table. “My best transit” cost structure is blended and consists of a commit and two tiers for the burst traffic. The tool supports different computational methods for volume-based accounting.
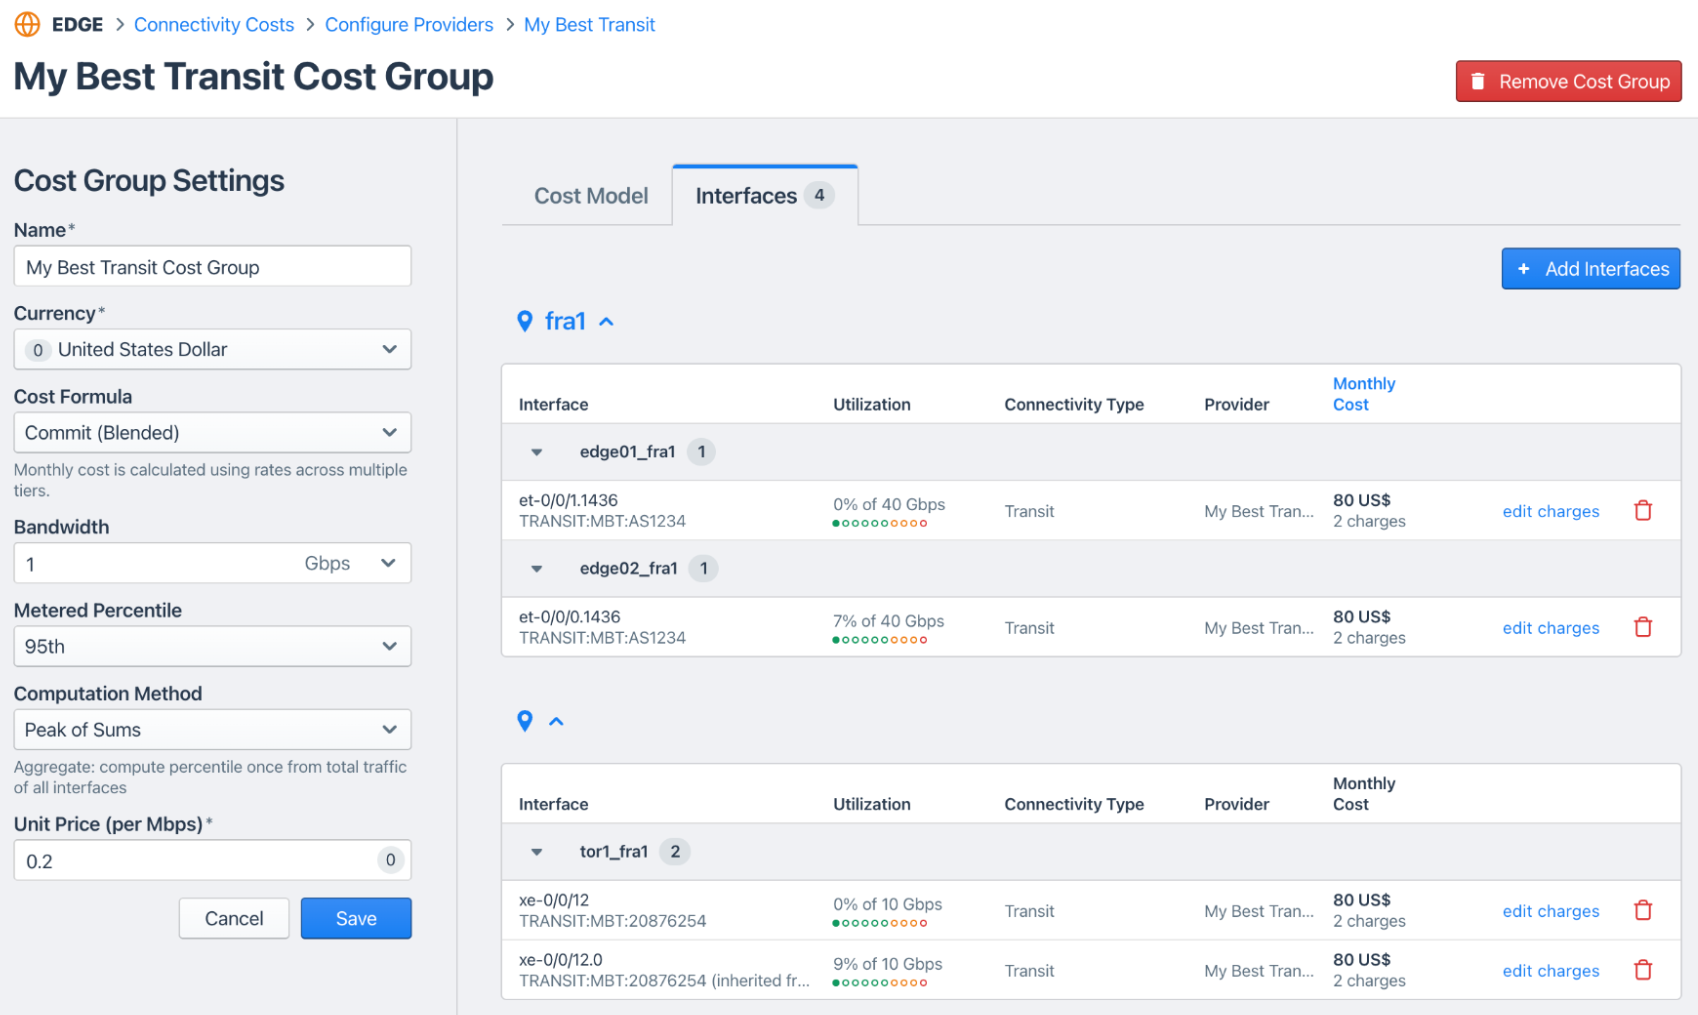
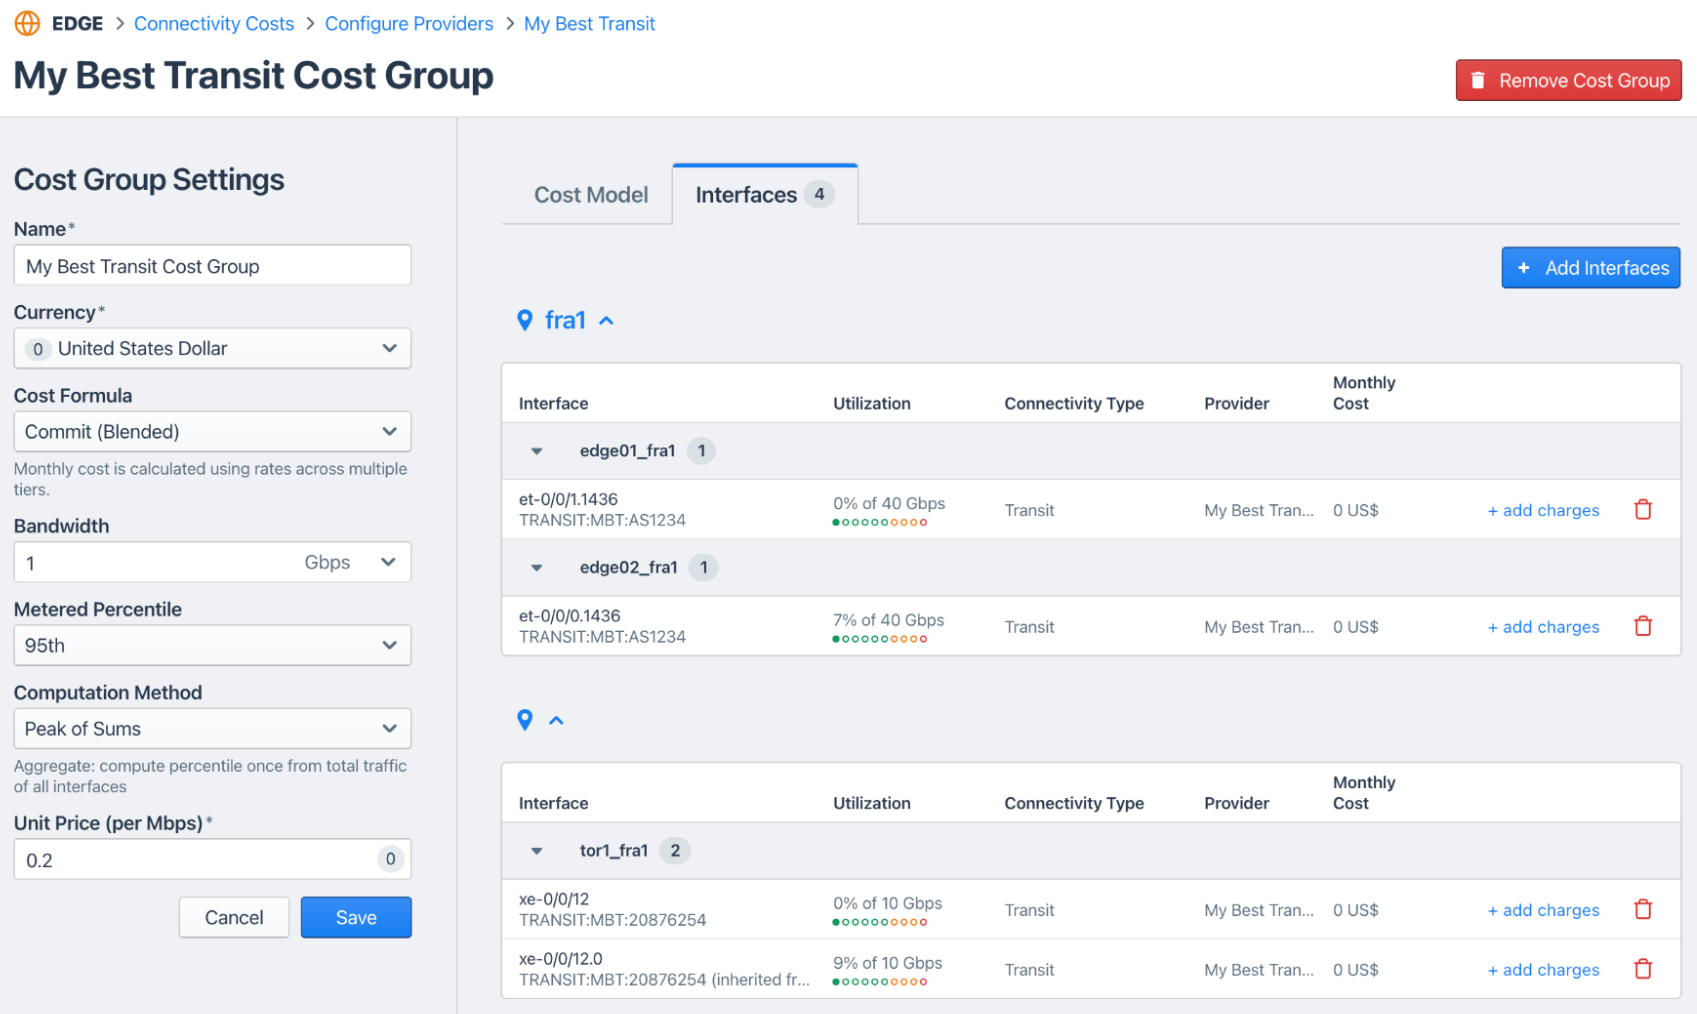
In the interfaces section, we can add the per-interface-based CAPEX and OPEX from the table.
Once everything is added, the workflow presents an overview of the minimum monthly spend for this provider — that is, the fixed costs that will occur even if no traffic is running via this provider.
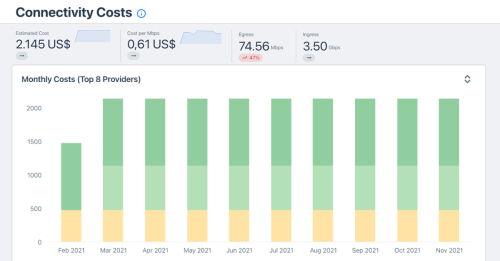
When all of your connections are added to the workflow, you’ll be able to track the trends of cost over time and analyze the cost based on different dimensions like sites, connectivity types and providers.

The tool will give you an estimate of the cost for the current billing cycle and remind you about when the next invoices from your providers should be paid.
With that, you can easily spot which connections contribute the most to your interconnection spend. And you are now in the best possible position to start optimizing your cost.
Stay tuned for part 2 of our “peering coordinator’s toolbox” series, where we’ll explore how you can evaluate and optimize your interconnections so you have the right balance between cost and performance.
Ready to try it yourself? Start a 30-day free trial.

